Die Organization

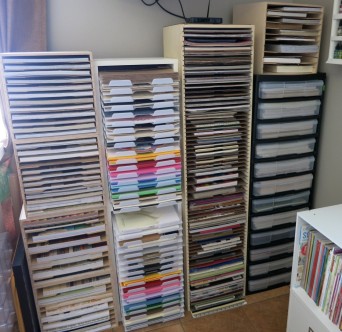
If you’re like me, you’ve simply fallen in love with thin metal dies like those from Spellbinders and Sizzix. I love them…which meas that storing them quickly became a huge problem. At first, I tried a small ArtBin container. Then I moved them into binders,  but when that became untenable (ridiculously heavy), I got realistic. What I needed was something that could store the dies that I had, but still leave me room to grow without becoming a bulky (and expensive) mess. Stamp-n-Storage to the rescue!

IMG_2661No, I’m not affiliated and I’m not getting paid for this, I’m just that happy to be organized. They make Die Totes that hold (correspondingly awesome) Magnet Cards. This combination has allowed me to store my dies by set and by category in a card catalog fashion. Holiday dies? Tags or labels? No problem! Simply placing my die sets on their respective magnet cards made keeping them organized and visible a breeze. Each pack of magnet cards now comes with a set of dividers…which means that I no longer need to guess where one category of dies ends and the next begins. When I’m not using them, they store neatly on top of my cabinet…instead of scattered all over my work surface.

I keep the labels from each die set and add them to my quick reference binders. These binders not only allow me to flip through all of my dies quickly when I’m working on a project, but also keep me from buying repeats when I’m shopping for more dies!

There are TONS of ways to store dies (I’m by no means an expert), but this is the way that works best for me. Why not give it a try? If you want to see what I make with my dies, check out my Etsy store here. Have questions or want to see more pictures? Leave a comment or send me a message, I’d love to know what you think!

Paper, Paper, Paper

IMG_2629

So paper…without it I would have a lot of pretty, but otherwise unrelated items in my studio. Millions of dollars annually (and maybe secretly) are being spent on different types, shapes, sizes, and colors of awesome paper products for everything from text books to scrapbooks. My husband would have you believe that I single handedly keep the decorative paper industry afloat, but I assure you that it is not the case. I do however, have some options for projects and I have to store them…somehow.

Best Craft Organizer makes both small and large paper racks that can store paper at an angle or level (depending on how you arrange the pegs). I have the small shelves stacked one on top of the other and that seems to work well for my open cardstocks. For my papers, like many things, I’ve found that if I can’t see it, I won’t use it. While stockpiling tons of specialty papers is fun, I’d rather use them than shove them in a drawer. You heard me…I literally had drawers of paper. It was a pain to get into them and I avoided the papers that I couldn’t reach (and then promptly forgot about them). So I decided to try a few different methods of sorting my papers into shelves. I had iris containers full of paper pads in 12 x 12. I’ve moved most of my papers into shelves from Stamp-n-Storage and Best Craft Organizer.

Stamp-n-Storage 12×12 Paper Holder

The Stamp-n-Storage paper shelves are sturdy wooden shelves that lend themselves well to stacking. Some crafters prefer to store them on their end as opposed to horizontal, but maybe I’m a traditionalist.

They make shelves to hold 12×12 and 8.5×11 paper, though I prefer to buy 12×12 shelves for both sizes because if gives me the greatest amount of flexibility. I purchased several that sit stacked on top of each other and they support the weight well. For those with Ikea Expedit or Kallax shelving, they make sizes specifically to fit these units.

Best Craft Organizer Paper Rack – Small

Best Craft Organizer makes both small and large paper racks that can store paper at an angle or level (depending on how you arrange the pegs). I have the small shelves stacked one on top of the other and that seems to work well for my open cardstocks.

For my smaller sizes (4×6 and 6×6), I use a method I borrowed from Jennifer McGuire Ink. She’s using Interdesign acrylic bins to organize her stamps and dies and I’ve adapted that method for my smaller paper packs. I can flip through them easily, use what I want, then return the rest.

At the end of a project, I’ve found that the best way to get a handle on the craftermath (yep, I said it) is to have a simple way to deal with my paper scraps. I’m reusing IRIS containers that I used to use for my stamps to hold scrap paper by color family. I can pull out the thin container, easily find a scrap for die cutting or stamping and then sweep the rest of the larger scraps back into the container. Easy, peasy.

How do you store your paper? Do you have a better way? I’d love to here about it! Leave a comment. Want to see what I do with all of that paper? Visit my Etsy store, here.

Keeping Crafts Organized

ink header There are so many tools and supplies available for crafting that the sky would seem to be the limit. In actuality,  that limit is more likely to be the size of your crafting space. I’ve scoured the internet searching for what I thought might be the very best ways to store my tools and supplies in a fashion that keeps them both organized and accessible.

1350958902036Yep, its hard to hard to believe that space used to be what I used for crafting. I started out just making cards for my grandmother because they made her smile. No matter the occasion, if there was a stamp or sticker that fit, another card was in the mail. As you can imagine, I accumulated supplies very quickly that way. I stored what I had in small plastic containers that stayed stacked on the floor near my table until I had a formidable pile of plastic containers.

Eventually, I made some changes…and then more changes as my family crafting project transformed into a business. My studio today is an ever-evolving place of papercrafting that I adore. Its my place of creative inspiration, sanity, and peace (even if there is a baby jumper near my desk).